Handle false positives
Once the installation of the Web Application Firewall (WAF) is complete, a tuning phase often follows. This is more likely if you've chosen paranoia levels 2, 3, or 4. The higher the paranoia level, the more sensitive the WAF will be. As a result, it will block requests it deems malicious. Taking the time to tune the WAF effectively means you receive robust protection and minimize the chances of false positive results.
After enabling the WAF module in logging mode for 24-48 hours, it is advised to switch to blocking mode.
When the WAF blocks a request, it will generate an event ID. You can use this event ID to investigate why the WAF has blocked a request. You can also use this information to 'allow' the path on a global or per-resource level. Allowing the path on a global or per-resource level will unblock the path and allow your users to perform the request without being blocked again.
1. Search by event ID
Navigate to the dashboard and select the drop-down menu titled Security Overview. Scroll down and select Event View.
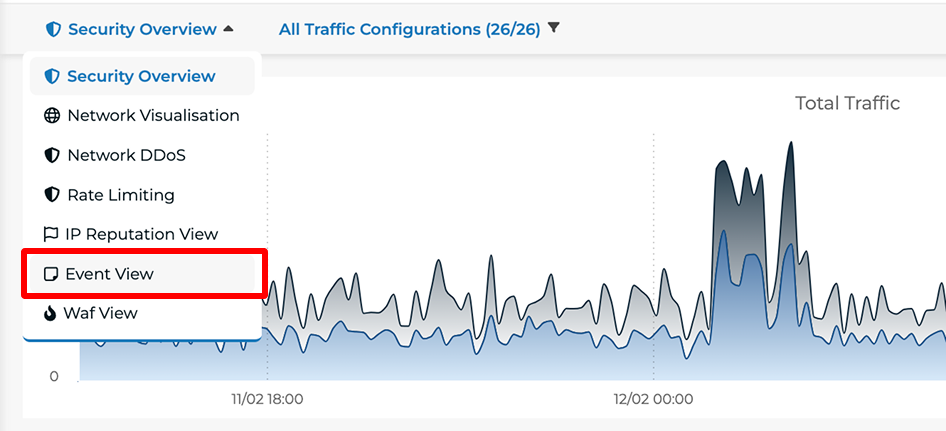
Paste your support ID into the search bar and select search. On the right-hand side you can adjust the time parameters to increase the time window when searching for a blocked request.

2. Get key information
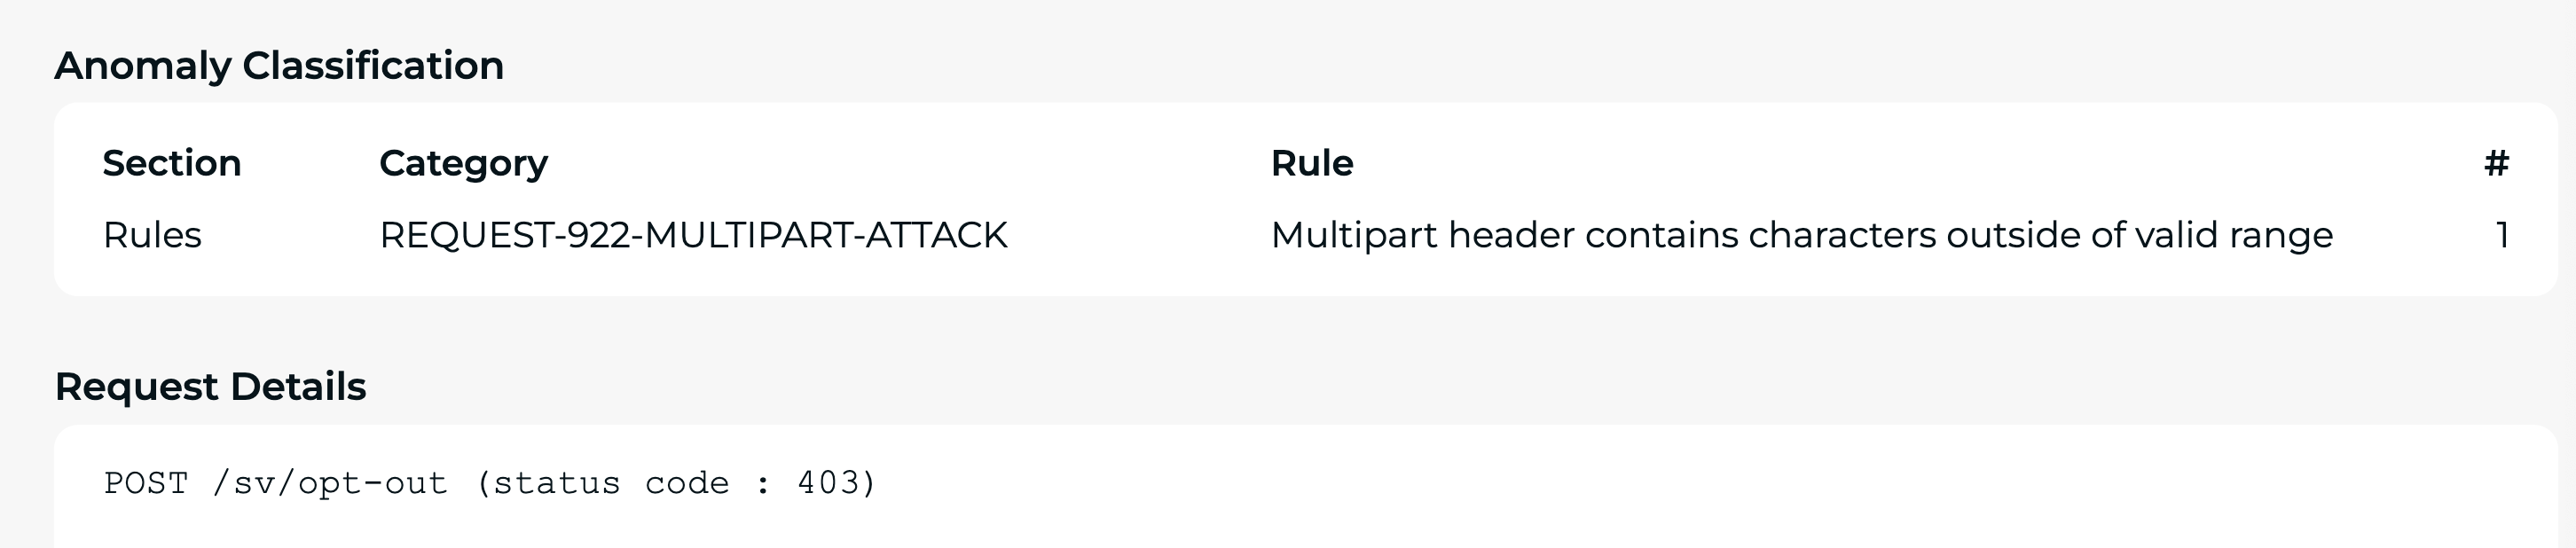
The key information needed to 'allow' a path are the rules listed under Anomaly Type and Anomaly. If excluding per resource, you will also need the first part of the Request Details referred to as the path.
3. Add exception to triggered rule
There are three options when tuning the WAF as stated below.
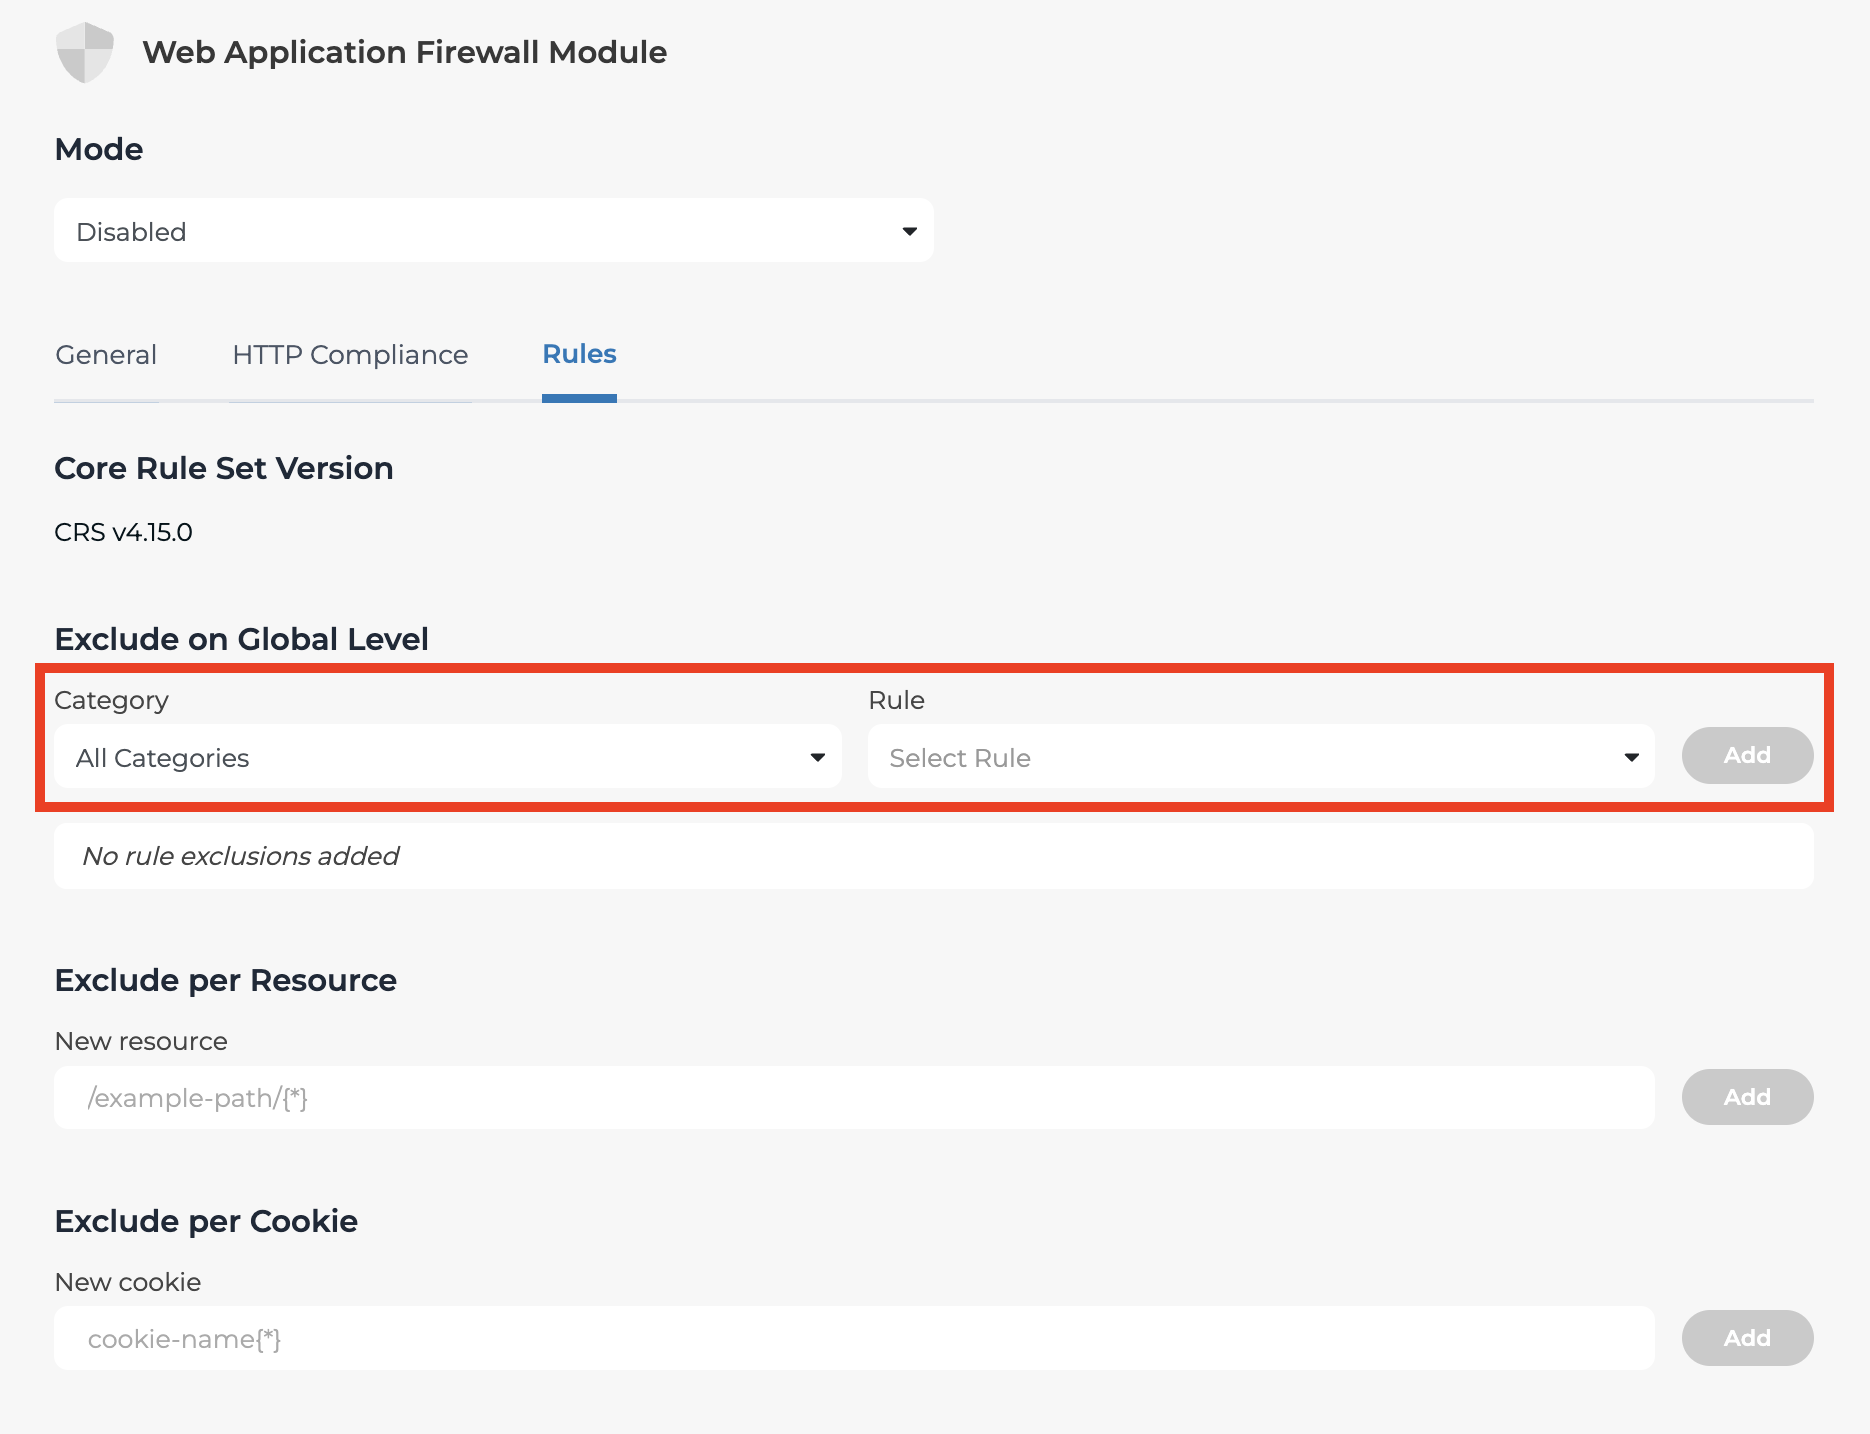
1. Exclude on a global level
This will allow any request that triggers a specific rule.
- Navigate to Traffic Management and select Traffic Configuration
- Select your proxy and select Web Application Firewall from the options at the top
- Next, select Rules
- Use the drop-down menus to find the category and rule you wish to allow and select Add
- Select Apply
2. Exclude per resource
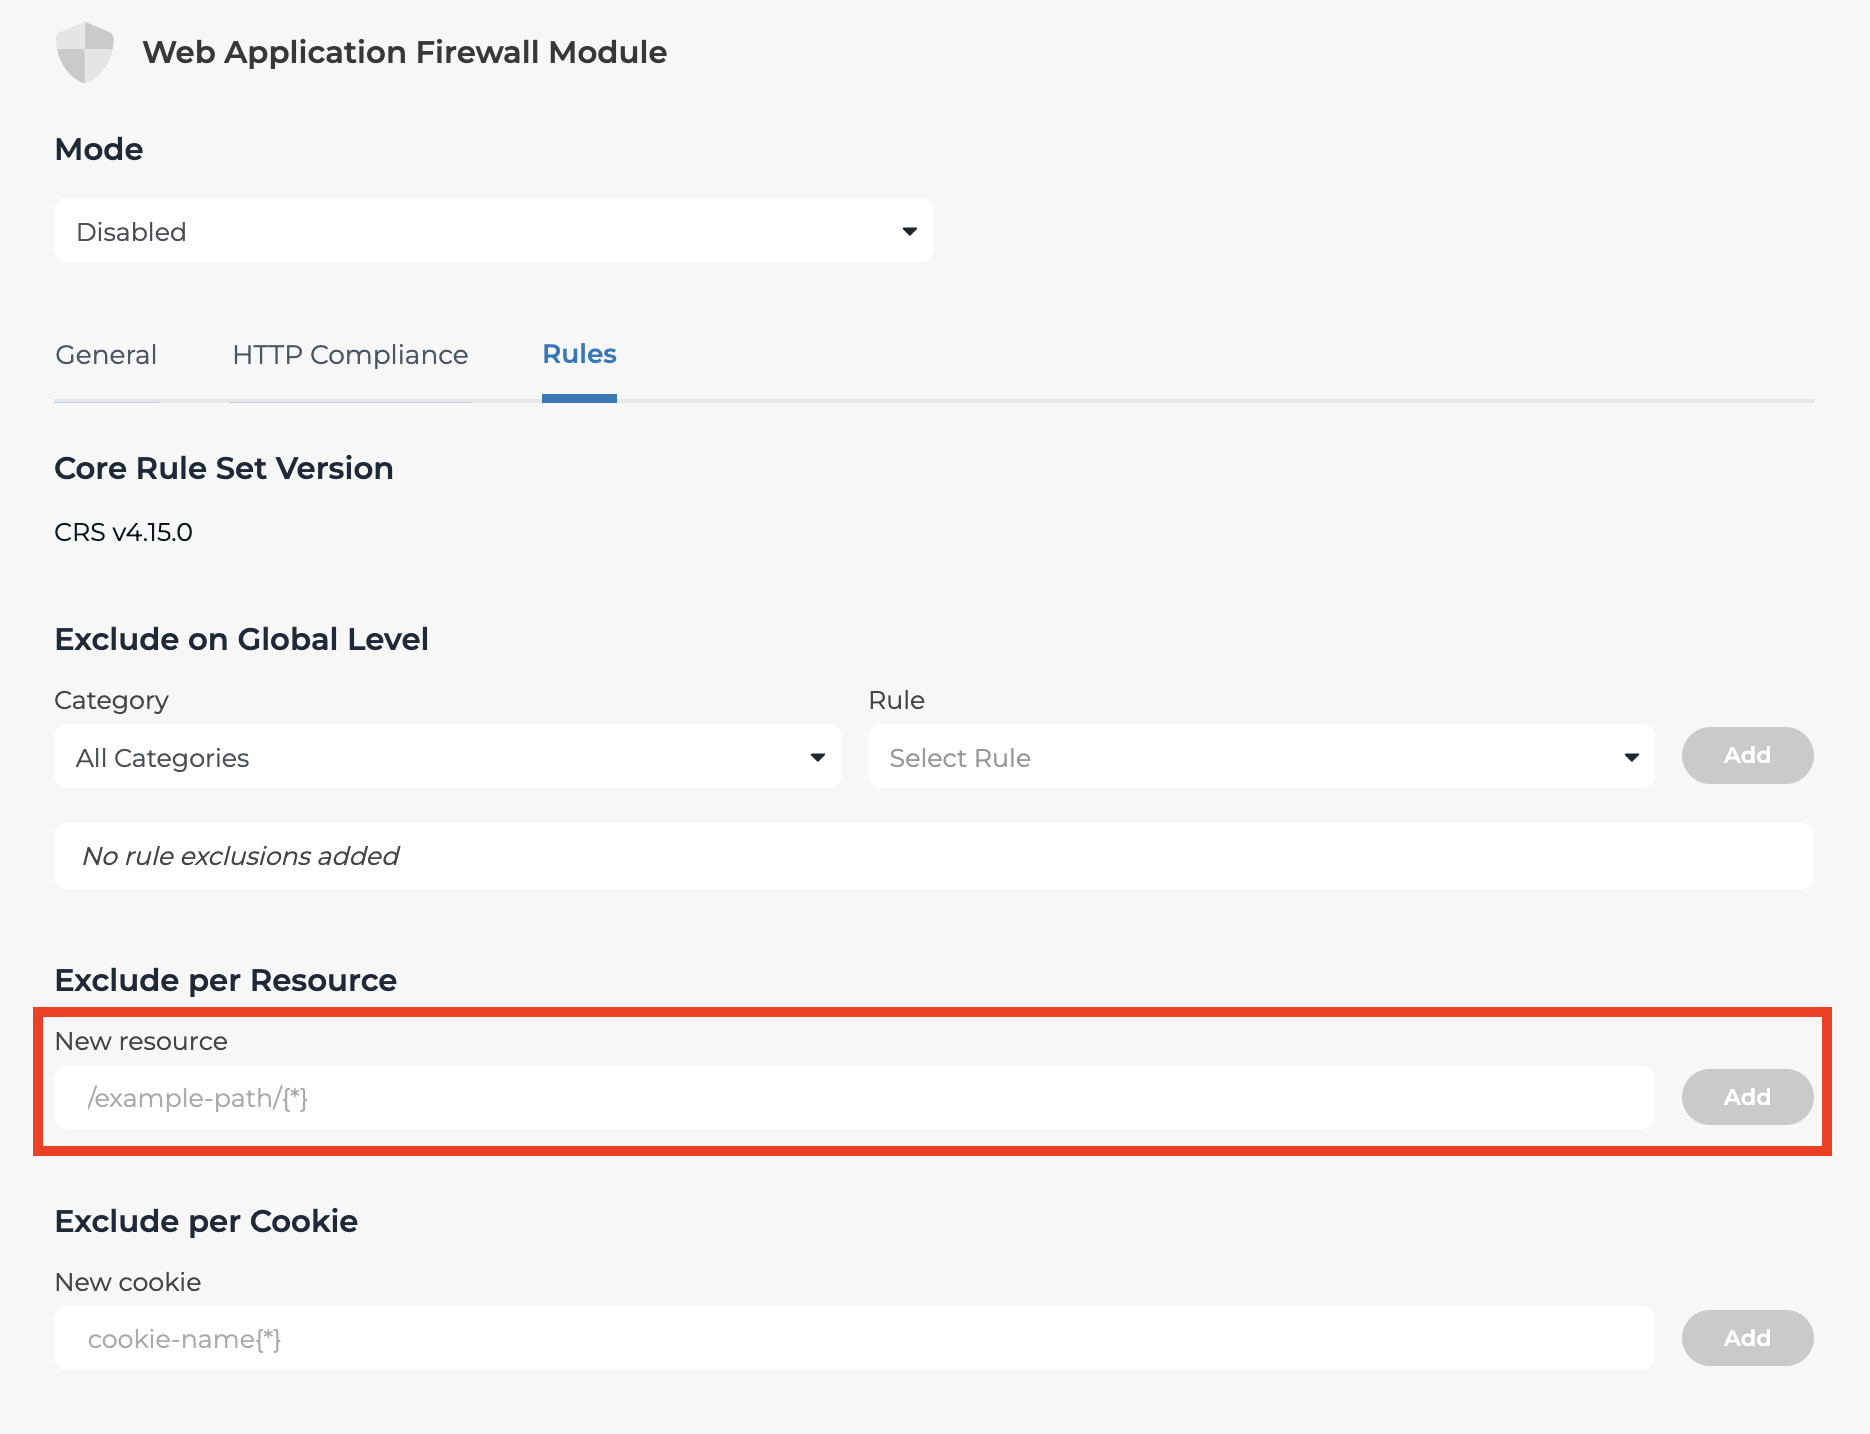
This allows you to be more specific and will allow any request that includes the rule AND the path.
You can allow for dynamic values by using the asterisk character wrapped in curly brackets {*} anywhere in the path.
- Navigate to Traffic Management and select Traffic Configuration
- Select your proxy and select Web Application Firewall from the options at the top
- Next, select Rules and scroll down to Exclude per Resource
- Add the path to the New Resource field or choose a previously added path from the Resource drop-down menu
- Find the category and rule you wish to allow in the drop-down menus
- Select Add
- Select Apply
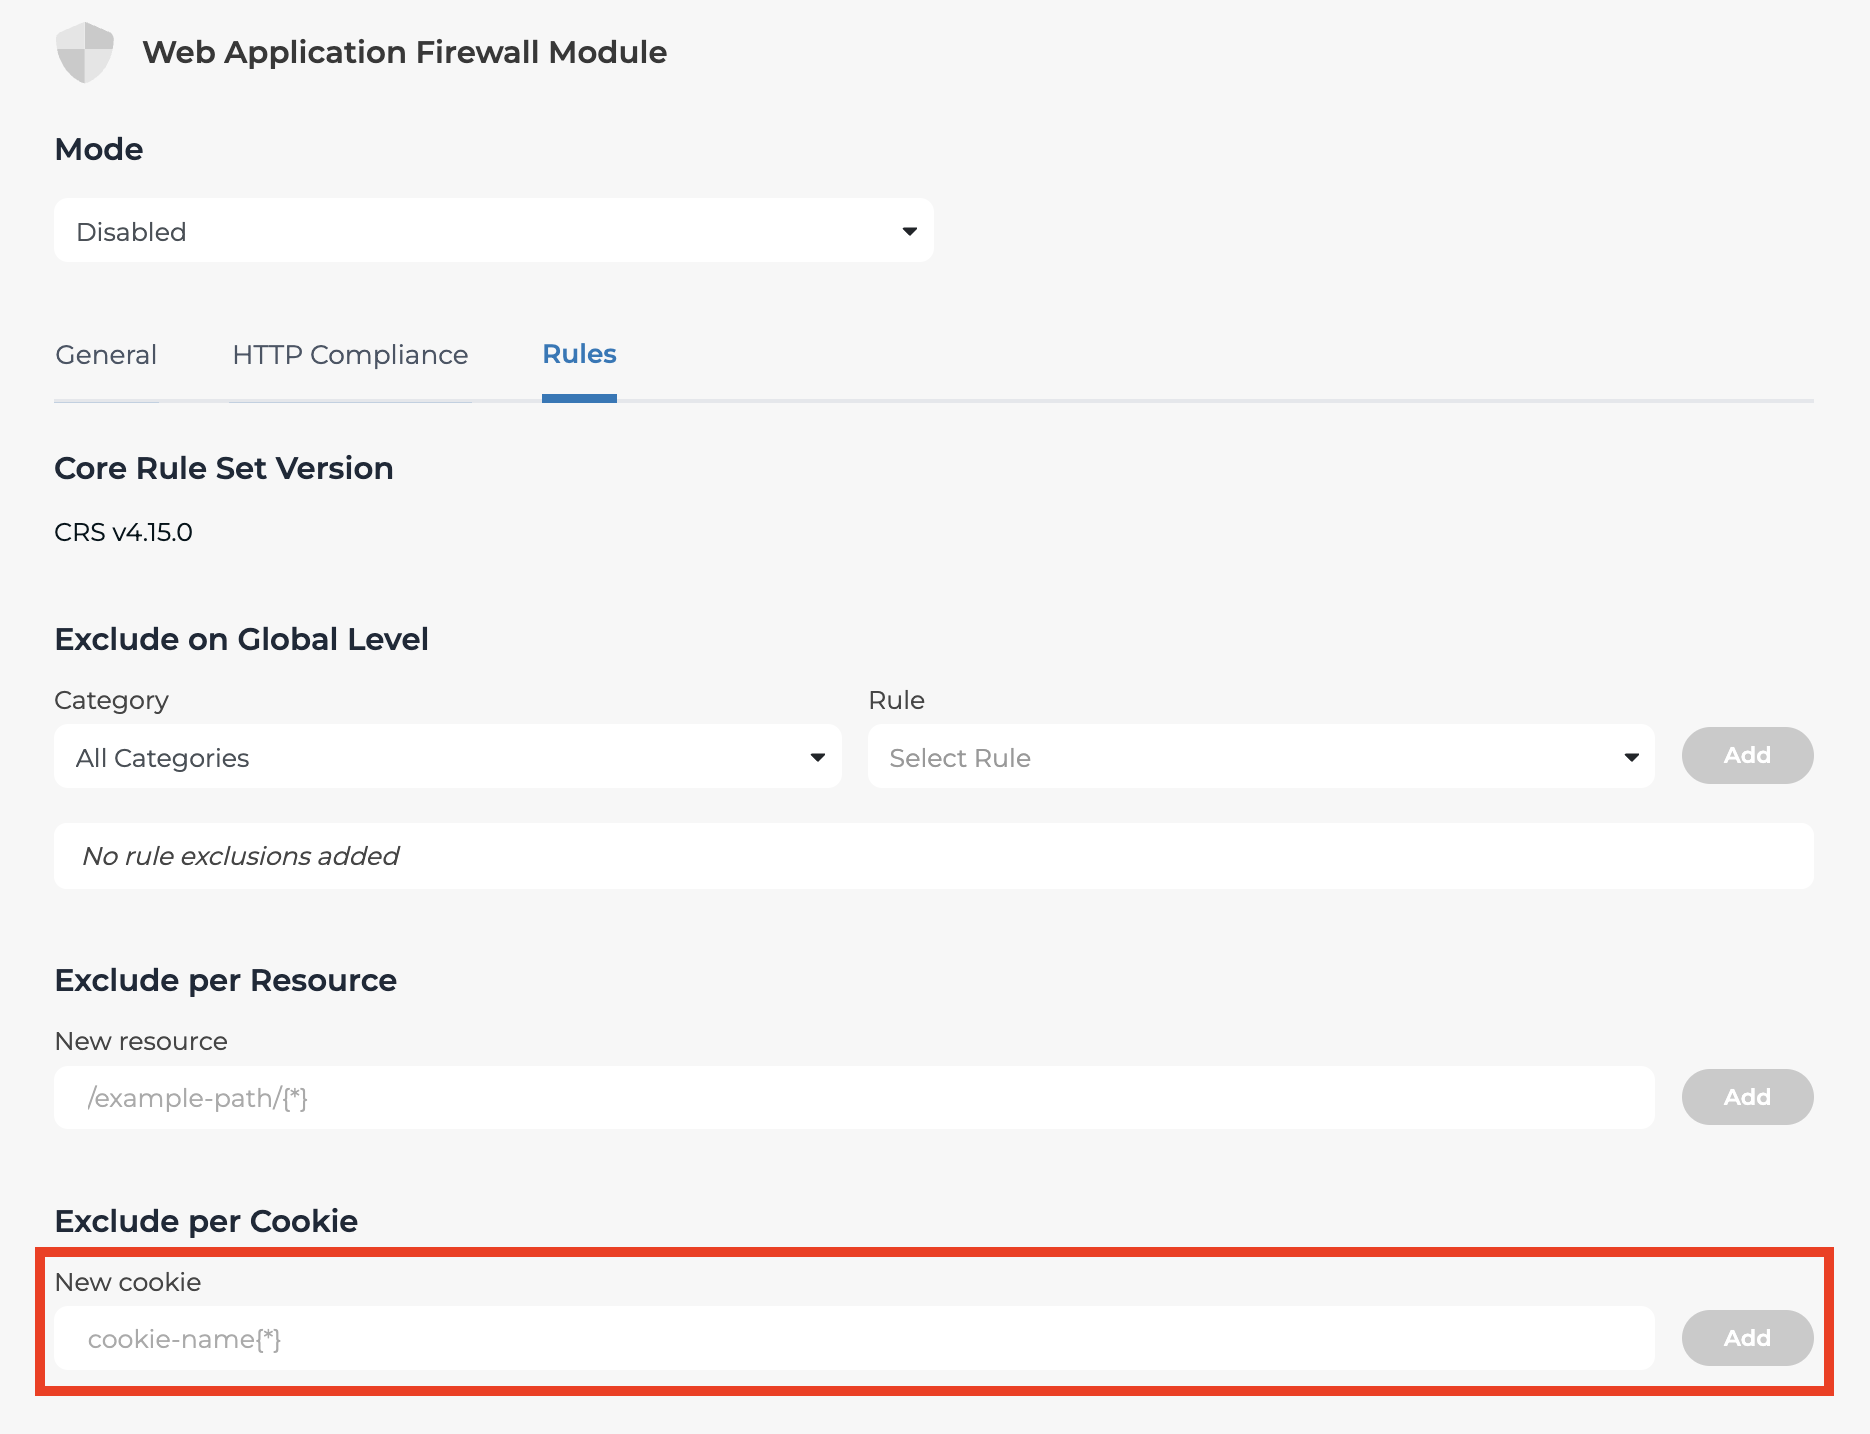
3. Exclude per cookie
This allows you to ignore specific cookies for individual rules or across all rules.
You can allow for dynamic values by using the asterisk character wrapped in curly brackets {*} anywhere in the cookie name.
- Navigate to Traffic Management and select Traffic Configuration
- Select your proxy and select Web Application Firewall from the options at the top
- Next, select Rules and scroll down to Exclude per Cookie
- Add the name of the cookie that you want to exclude. Wildcard notations are allowed here in the format
{*}. - Find the category and rule you wish to allow in the drop-down menus
- Select Add
- Select Apply
Troubleshooting tip: Some rules are written similarly, for example, 'Request content type is not allowed by policy' and 'Request content type charset is not allowed by policy'. Be sure you're selecting the correct rule or you may receive an error message when you select apply.