How to Create and Apply Custom Pages
What are Custom Pages?
Custom pages are HTML files that you can upload to our platform. They allow you to replace the default error pages we provide when certain events occur, such as:
- A WAF block is triggered.
- A specific error code happens.
By using custom pages, you can ensure your users see a branded or user-friendly error message instead of a generic one.
Step 1: Upload a New Custom Page
Navigate to Shared Settings > Custom Pages. On this page, you can:
- Upload a new custom page (HTML file)
- Delete an existing page (only if it's not currently in use by any Traffic Configuration)
- Check usage of each page to see which Traffic Configurations are linked to it.
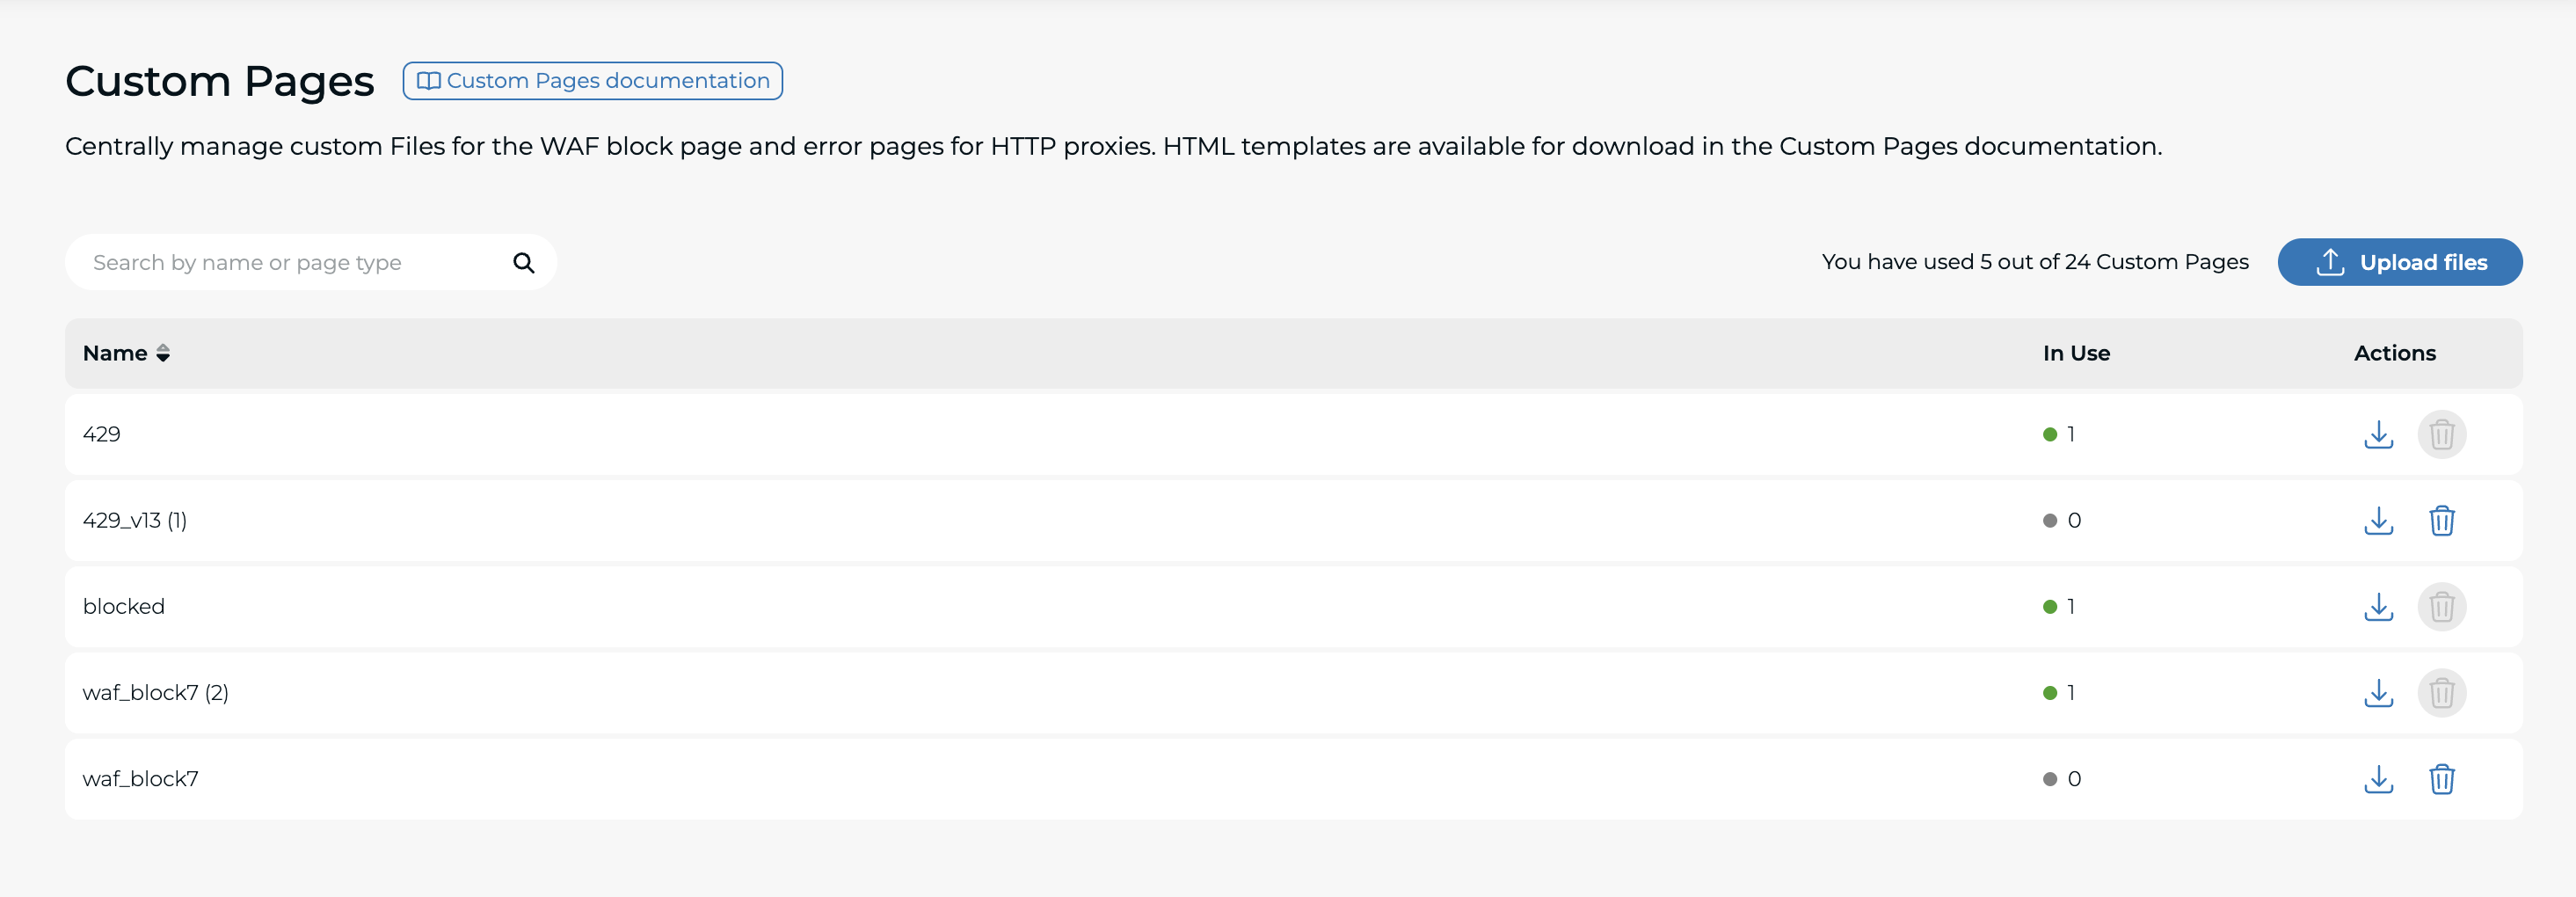
Once uploaded, the page will be available to assign to Traffic Configurations.
Step 2: Apply a Custom Page to an HTTP Proxy
After uploading, you can apply your page to any HTTP Proxy in your account:
- Go to the desired HTTP Proxy
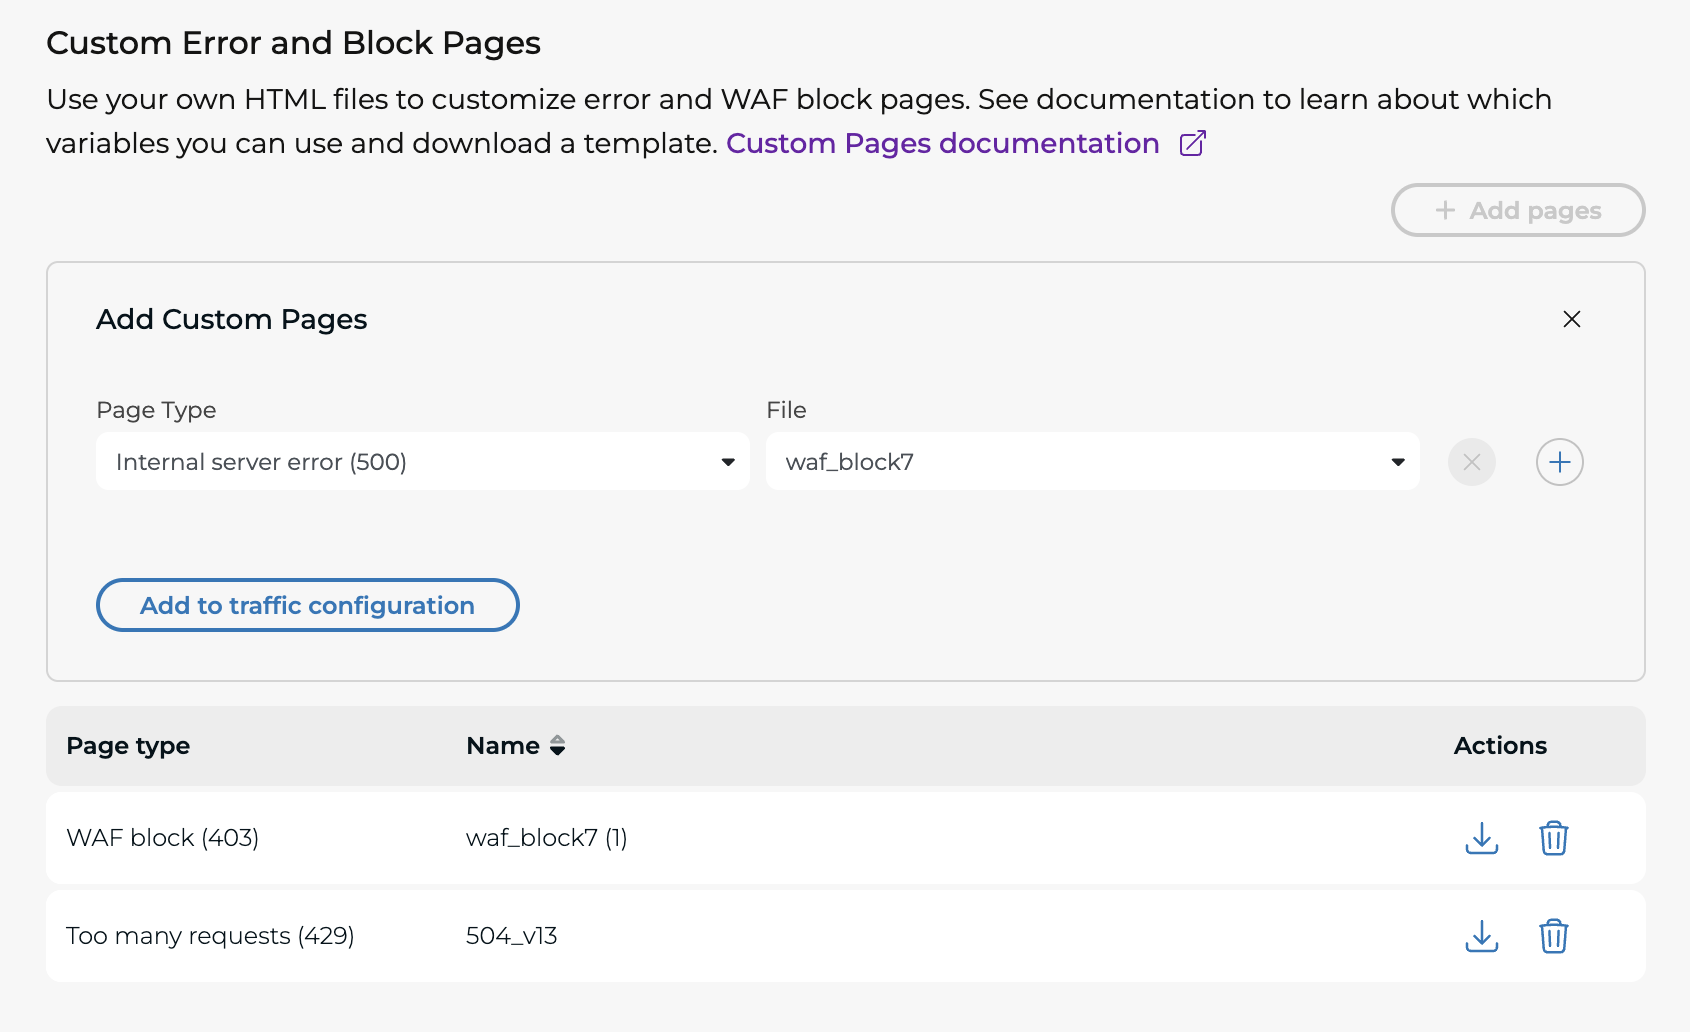
- Under General Settings, select Custom Pages.
Here, you'll see the currently assigned pages for that Traffic Configuration.
To add a new one:
- Click Add Custom Page
- Choose the error type that should trigger this page
- Select the HTML file you want to use.
Available Variables for Custom Pages
Inside your HTML files, you can use the following variables to display dynamic values:
- TPC Name:
%_tpc_name_% - Timestamp:
%_time_% - Client IP:
%_client_ip_% - Host:
%_host_% - Incident ID:
%_incident_id_%
These placeholders will be replaced automatically at runtime with the appropriate values.
Download Default Templates
To make it easier to get started, we provide default HTML templates for
each supported error type.
You can download them here:
Download Default Templates (ZIP)
We recommend starting with these templates and customizing them with your own branding and messaging.
Supported Error Types
You can assign a custom page to the following error types:
- WAF block (403): Proxy WAF blocks request
- Too many requests (429): Proxy rate limit blocks request
- Internal server error (500): Proxy cannot process user's request
- Bad gateway (502): Asset is not responsive to proxy
- Service unavailable (503): Proxy is unable to handle user's request
- Gateway timeout (504): Asset response to proxy times out
Summary
- Custom pages let you customize error responses with your own HTML
- You upload them in Shared Settings > Custom Pages
- You assign them to proxies under General Settings > Custom Pages
- You can use built-in variables in your HTML for dynamic information
- Default templates are available for quick customization
- The following errors can be customized: 429, 500, 502, 503, 504, 403
This ensures a more controlled and branded experience when errors occur.