Configure a new proxy
This article describes how to configure a new proxy to protect a web application using the Baffin Bay Threat Protection platform. Configuring a proxy involves the following steps:
- Add certificates
- Set up your HTTP Proxy service
- Test the configuration
- Update DNS record (if needed)
- Limit access to the protected asset
Note
Lowering the time-to-live (TTL) to five minutes or less, will significantly reduce the time needed for the changes in step three to take effect.
Step 1: Add Certificates
Before configuring an HTTPS proxy, a TLS certificate must be available in the platform. You can either:
- Upload your own certificate and private key (PEM format), or
- Generate and manage a certificate using Let’s Encrypt directly from the portal
Certificates are managed centrally and can be reused across multiple proxies and SNI hosts.
Step 2: Create a New Proxy
Navigate to: Traffic Management → Traffic Configuration → New → HTTP Proxy
This creates a new protected traffic configuration that will sit in front of your application.
General Settings
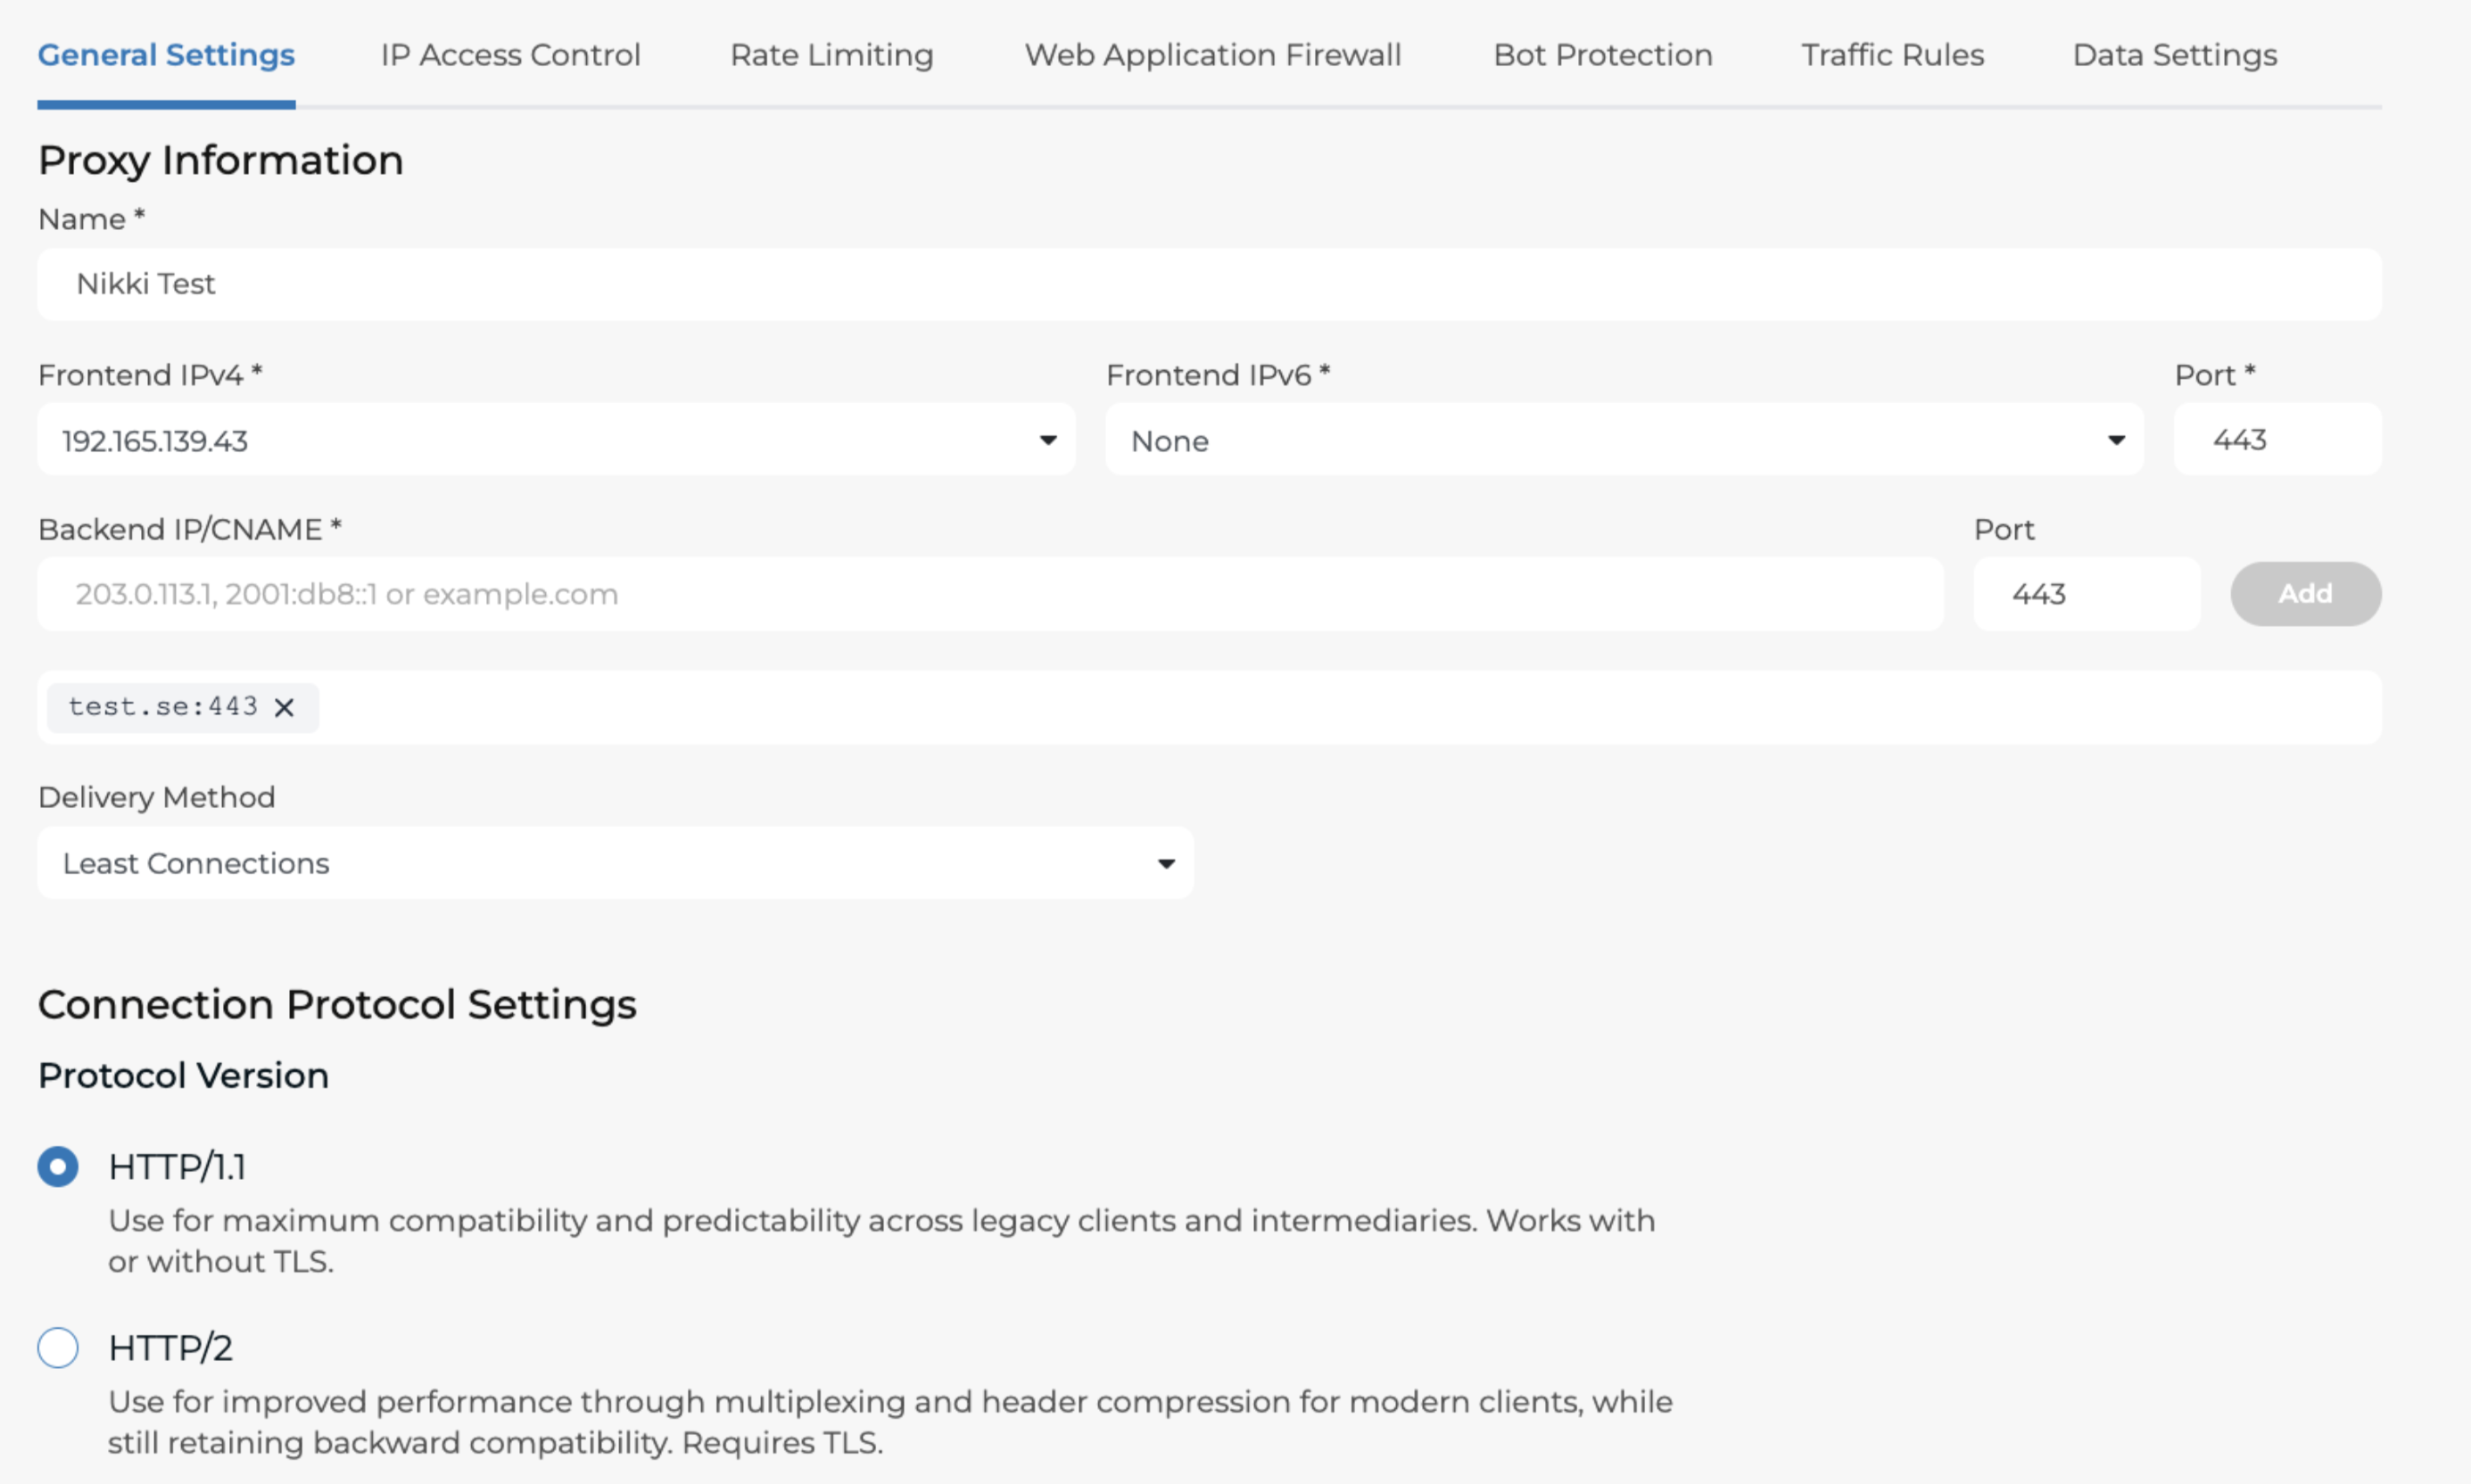
Proxy Information
| Field | Description |
|---|---|
| Name | Display name for the proxy configuration |
| Frontend IPv4 / IPv6 | Select one of your assigned Anycast IPs. Your DNS record will point to this IP |
| Port | Port the proxy will listen on (commonly 80 or 443) |
| Backend IP / CNAME | The origin server IP address or hostname traffic should be forwarded to |
| Backend Port | Destination port on the backend server |
| Delivery Method | Load-balancing behaviour used when multiple backends are configured |
Supported delivery methods:
- Round Robin – evenly distributes connections
- Least Connection – sends traffic to the backend with the fewest active connections
- IP Hash (Source IP persistence) – ensures client stickiness when required
Connection Protocol Settings
Protocol Version
Select the HTTP protocol version supported by your application:
- HTTP/1.1 – Maximum compatibility with clients and intermediaries. Works with or without TLS.
- HTTP/2 – Improved performance using multiplexing and header compression while still retaining backwards compatibility. (requires TLS)
TLS Settings
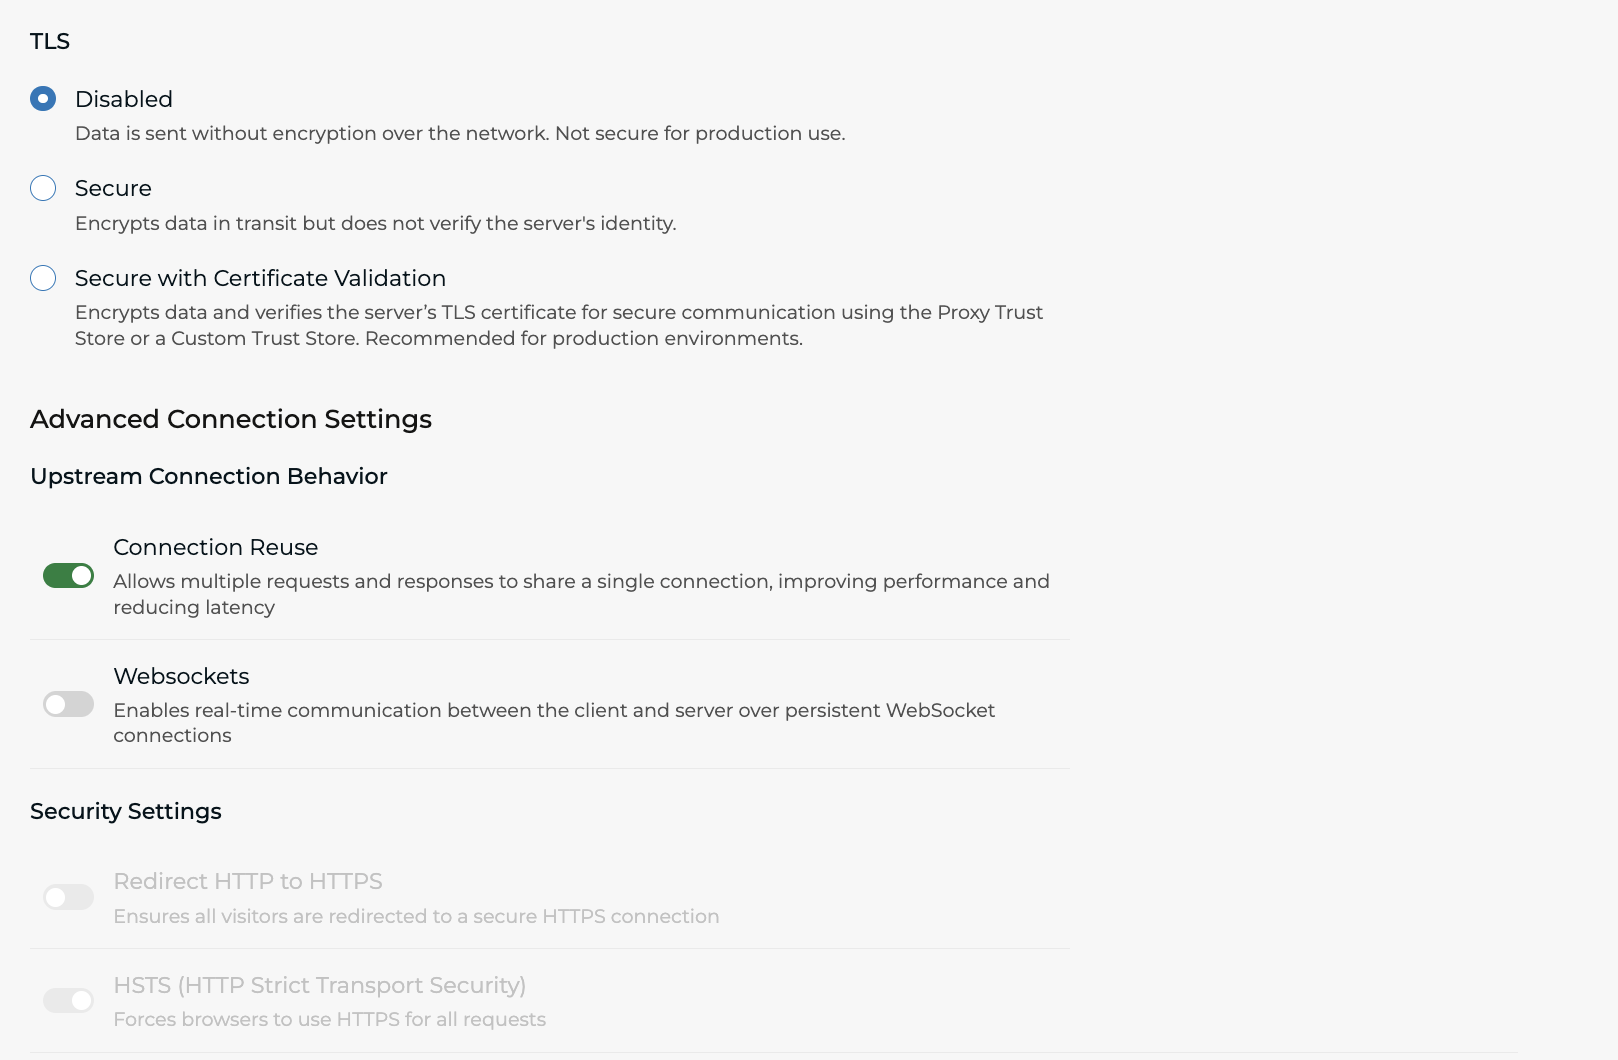
| Option | Description |
|---|---|
| Disabled | Traffic is sent unencrypted (not recommended for production). |
| Encrypted | Encrypts data in transit but does not verify the server's identity. |
| Encrypted with Certificate Validation | Encrypts data and verifies the server’s TLS certificate for secure communication using the Proxy Trust Store or a Custom Trust Store. Recommended for production environments. |
Overview of Certificate Validation
Traffic between the Proxy and your Server can be "Encrypted" without validation. However, for production environments, it is recommended to use Encrypted with Certificate Validation.
There are two ways to validate the certificates presented by the backend server:
-
Proxy Trust Store: Use this if your server certificate is issued by a well-known, public Certificate Authority (see https://wiki.mozilla.org/CA/Included_Certificates).
-
Custom Trust Store: Use this if your server uses a private CA, a self-signed certificate, or a specific internal root.
Step 1: Upload the Backend Server CA (For Custom Trust Store)
If you are using a private CA for your server, you must first tell Baffin Bay to trust it.
- Navigate to the Certificates page in the portal.
- Select the “New” button and choose “Certificate Authority (CA) certificate”.
- Paste the CA certificate, including a self-signed root certificate, in the text area. Select “Next.”
- Once uploaded, it will appear in the list.
Step 2: Enable Validation in the Traffic Configuration
- Go to the Traffic Management section and select your specific HTTP Proxy.
- In the General Settings tab, locate the TLS configuration section.
- Select the radio button for Encrypted with Certificate Validation.
- Under Configure Trust Store, choose your preferred method:
- Proxy Trust Store: Simply select this to use Threat Protection's preloaded public CAs (see https://wiki.mozilla.org/CA/Included_Certificates).
- Custom Trust Store:
- Select the radio button for Custom Trust Store.
- Choose your uploaded CA (from Step 1) from the dropdown and click Add.
- The CA will now appear in the list with its Common Name and Expiration.
Step 3: Verification
- Check for Warnings: If the portal displays a warning regarding CRL validation, ensure that all selected CAs have CRL enabled with the appropriate URL if you require revocation checks.
- Save Changes: Apply the configuration to the proxy.
- Test Connectivity: Ensure the proxy can still reach the backend.
Trust Store
A Trust Store is a collection of CA certificates. It acts as a trust anchor to verify that websites, software, and apps are legitimate and haven't been tampered with. By validating using these pre-approved certificates, your system ensures your encrypted connections are actually safe.
TLS can be configured with a Proxy Trust Store that validates backend certificates using well-known CAs preloaded into the proxy, or a Custom Trust Store where up to five CAs can be used for validating backend certificates.
Advanced Connection Settings
Upstream Connection Behaviour
| Setting | Description |
|---|---|
| Connection Reuse | Allows multiple requests to share a single backend connection, reducing latency |
| WebSockets | Enables real-time communication between the client and server over persistant Websocket connectors |
Note WebSockets are not supported when HTTP/2 is enabled.
Security Settings
Redirect HTTP to HTTPS
When enabled, all incoming HTTP requests are automatically redirected to HTTPS.
HSTS (HTTP Strict Transport Security)
HSTS forces browsers to always use HTTPS for the site.
Configurable options include:
- Maximum age (in seconds)
- Include subdomains - applies setting to all site's subdomains
- Preload - including your site in the HSTS Preload list (managed by Google and used by all major browsers) ensures HTTPS is always enforced from the first visit
Certificates & SNI Hosts
Manage Certificates and SNI Hosts
HTTPS and HTTP/2 proxies use Server Name Indication (SNI) to determine which certificate to present to the client. For each SNI host you configure:
- Select the certificate to present
- Specify the hostname (e.g. www.example.com) Only traffic matching a configured SNI host will be accepted by the proxy.
Advanced Configuration
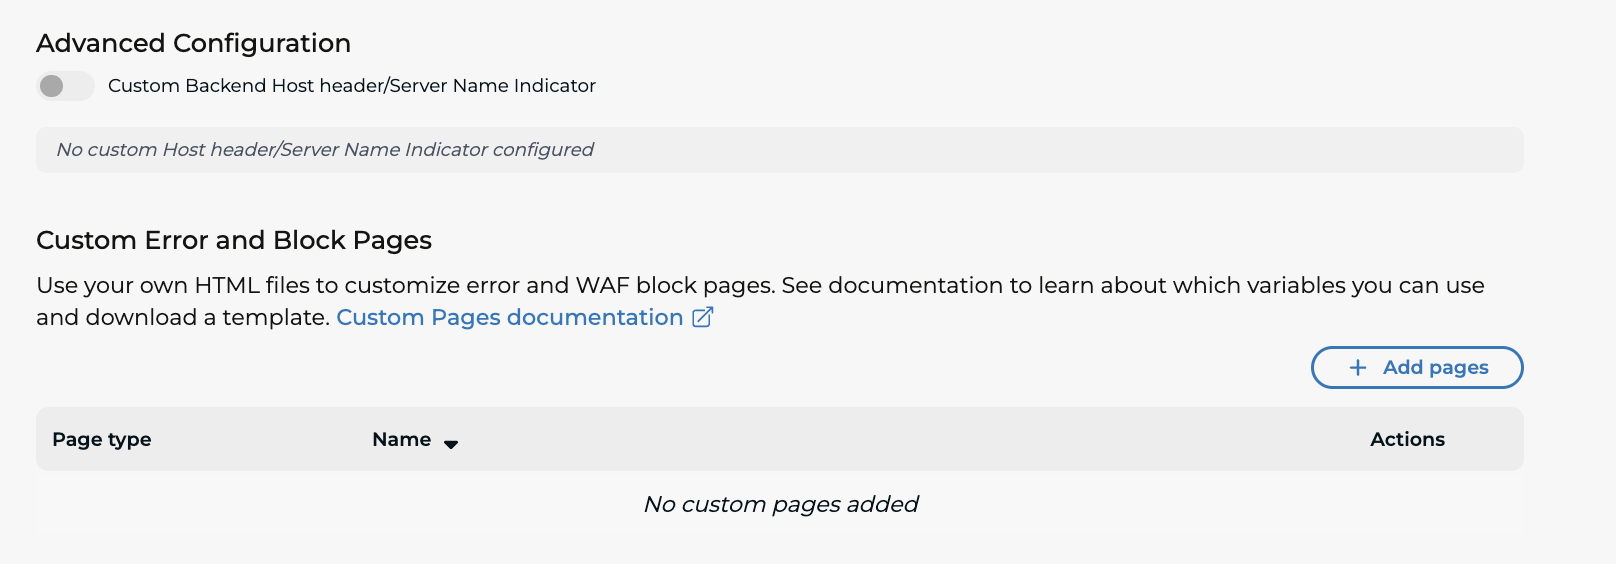
Custom Backend Host Header / Server Name Indicator
Some backend applications expect a different Host header or SNI value than the one provided by the client. When enabled, this setting allows you to:
- Override the Host header sent to the backend
- Override the SNI value used during the TLS handshake to the origin server
This is commonly required when protecting shared hosting environments or legacy backends.
Step 3: Test the Configuration
You should now be able to access your service through the anycast IP assigned to you.
You can test this by using cURL, or changing your local host file to validate. If you are using your own routed IP (Customer Anycast IP), you can perform tests against the same IP.
Verify the following:
- TLS negotiation
- Correct certificate presentation
- Application functionality
- No unexpected blocking
If issues occur, contact the Threat Protection Support team.
Step 4: Update DNS Records
To ensure traffic flows to the new protected IP, you'll need to redirect the traffic by updating your DNS A/AAAA record by pointing it at the proxy service configured.
- Point the relevant A / AAAA record to the selected Anycast IP
- Wait for DNS propagation to complete
You can verify propagation using tools such as dig or nslookup.
Step 5: Restrict Direct Access to the Backend
Once traffic is flowing through the proxy successfully, we strongly recommend restricting access to your backend server. This can be done by:
- Updating firewalls and routers
- Contacting your transit service provider to set an ACL (access control list) to limit the incoming traffic to the Threat Protection Center IP ranges
This prevents attackers from bypassing the proxy and directly targeting the backend.
The full list of Threat Protection Center source IP ranges is available in the portal, under the TPC IP Sources tab.
Alternatively, contact the Threat Protection Support team for assistance.